Instructions cover all Infiniti G37 models
The following are instructions to replace the rear sway bar on a Infiniti G37 coupe, sedan, or
convertible. Steps can also be used for 2007+ G35 sedans as well. Prior to installation it's always
easier to jack up the car. Be safe and use jack stands if at all possible. This task can be completed
without removing the wheels. |
Parts Supplied By:
 |
|
Tools needed: ratchet, 10mm socket, 14mm deep-well socket, 17mm socket (or wrench)
|
|
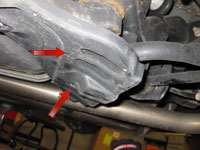 |
Step 1: Loosen Rear Lower Covers
The rear sway bar mounts in front of the rear axle. To get access to the rear connecting rod bolts and the sway bar mounts you need to work around a pair of plastic covers. The covers are held up with three 10mm bolts but only two of them need to be removed so the covers can be bent down.
|
|
|
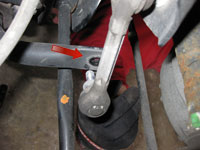
Step 2: Remove Sway Bar End Link Nuts
Use the 17mm socket or wrench and remove the sway bars connection to the Stabilizer connecting rod (end links).
|
|
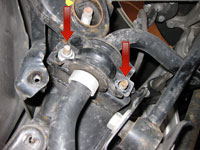 |
Step 3: Remove Sway Bar Clamps and bar
The sway bar is held in place by a pair of clamps. Each clamp has 2ea 14mm nuts. Pull down the plastic cover for access and remove the nuts to fully disconnect the sway bar. Now, the rear sway bar is simply not going to come out without a battle. For this installation the exhaust center section was disconnected and dropped in order to remove and reinstall the sway bar. I did not document this step as I no longer have the stock exhaust but it should be straight forward.
|
|
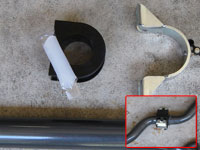 |
Step 4: Install Bushings
The new sway bar should include a new pair of bushings, lube, and clamps. Prior to installation use a generous amount of lube to coat the inside of the bushing. The bushing itself is not solid so it can be spread open to fit over the bar.
|
|
| |
Step 5: Installation
Install in reverse order. The exhaust should hold the sway bar in place. Reinstall the 10mm bolts for the two lower covers when completed.
NOTE: The Hotchkis rear sway bar has three adjustment settings whereas the Stillen sway bar for the Intiniti G37 only has two. The softest setting is when the end link bolt is in the furthest hole to the end. I suggest you start with this setting while getting used to the new cornering aspects of the vehicle before adjusting it stiffer.
|
|
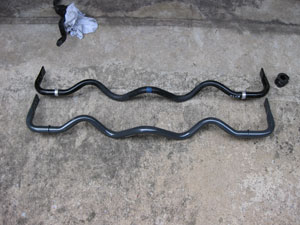 |
Comparison to factory
The installation detailed via this article utilizes Hotchkis components and is part of their #22441 kit. Compared to factory:
Specs: Rear Sway Bar 28.5mm (Ø1.125") Hollow 3 Way Adjustable (non-AWD)
+130, 185, 260% Stiffer than Stock G37
+15, 40, 75% Stiffer than stock G37S
+60, 100, 155% Stiffer than stock G35S
|
Disclaimer: The author will not be held responsible nor held liable for any damages due to these instructions. Anyone following
these directions are doing so at their own risk. This Documentation may not be distributed without the authors consent.
|

